PTO Attachments Guide: Choose, Hook Up, and Use PTO Implements Safely
Everything homeowners, small acreage owners, and compact/utility tractor operators need to know about power take-off attachments, from choosing the right PTO implement to safe hookup and maintenance.
Last updated: 2/2026
Reviewed & Published By
Tractor Iron Editorial Team
"Our team works directly with compact and utility tractor owners and prioritizes real-world safety, correct driveline setup, and equipment longevity."
Content Review Process
- Written using manufacturer manuals and field-proven PTO hookup procedures
- Cross-checked for OSHA/ASABE PTO safety alignment
- Updated February 2026 for current compact + utility tractor standards
- Structured for safety-first operation
This guide does not promote specific brands. Always verify specifications in your tractor and implement manuals.
Key Takeaways
- Most compact and utility tractors use 540 RPM PTO. Always match implement RPM to your tractor before purchasing.
- PTO shaft length must be checked at full raise and full lower. Incorrect length causes catastrophic failure.
- Never approach, step over, or adjust a rotating PTO shaft. Entanglement is the leading cause of fatal tractor injuries.
- Overload protection (slip clutch or shear bolt) is essential for implements that strike obstacles like rocks or stumps.
- Grease universal joints and telescoping tubes every 8 hours of use. A dry driveline fails fast.
- Always verify hitch category, PTO spline size, and tractor PTO HP match the implement requirements before connecting.
PTO Basics: What It Is and Why It Matters
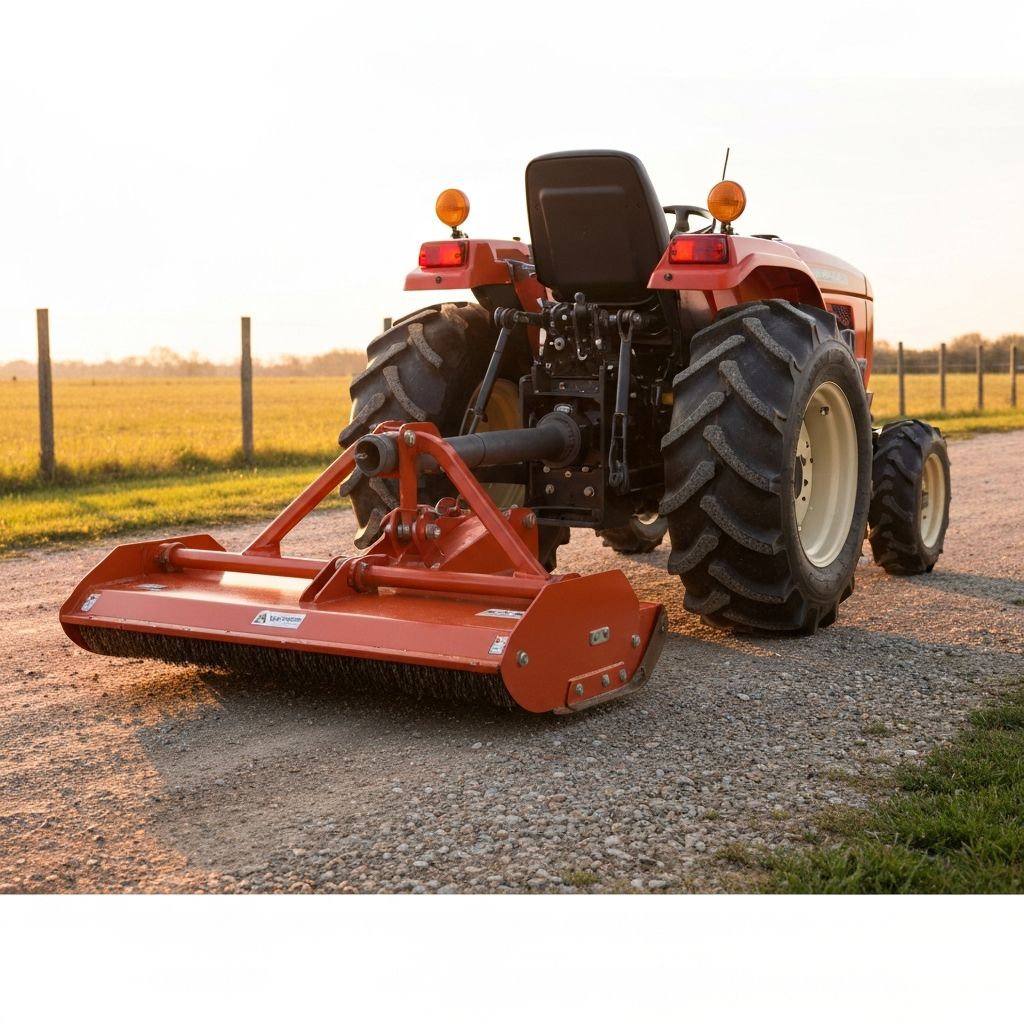
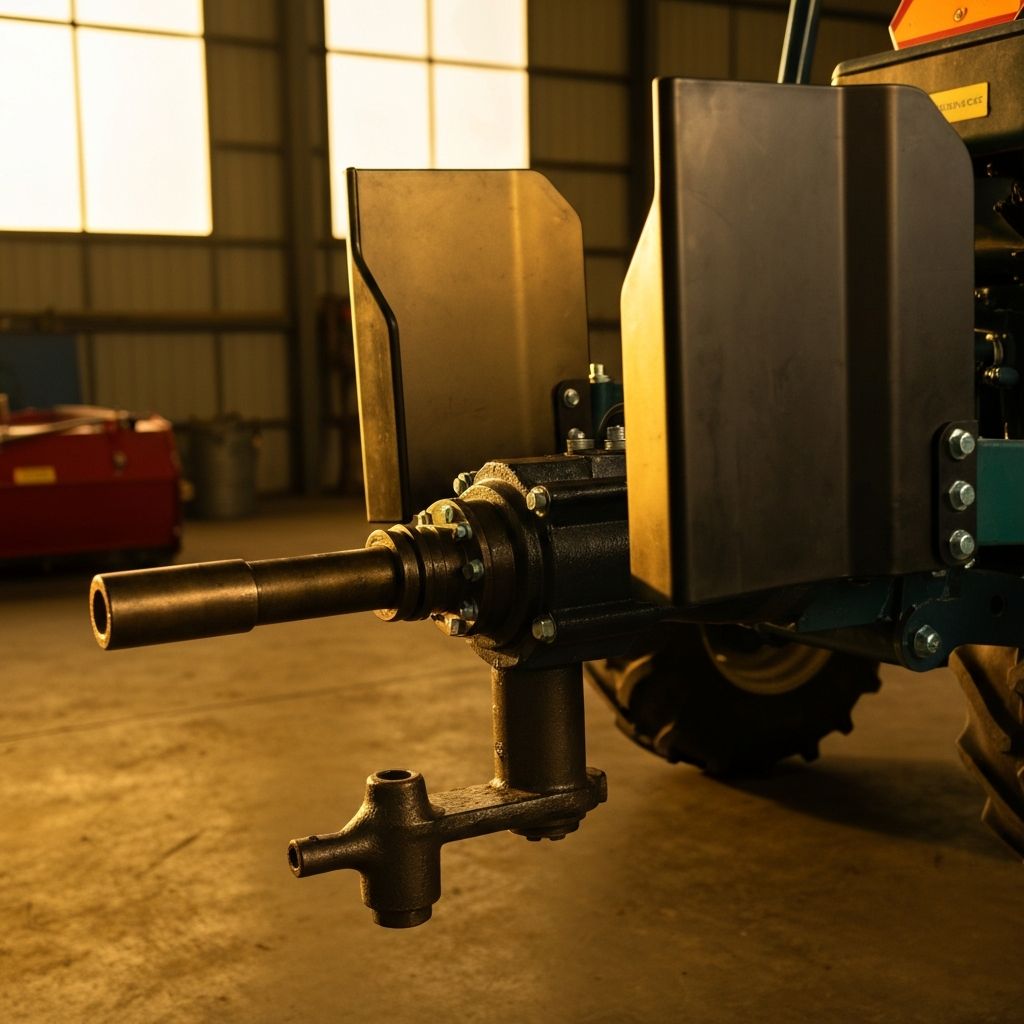
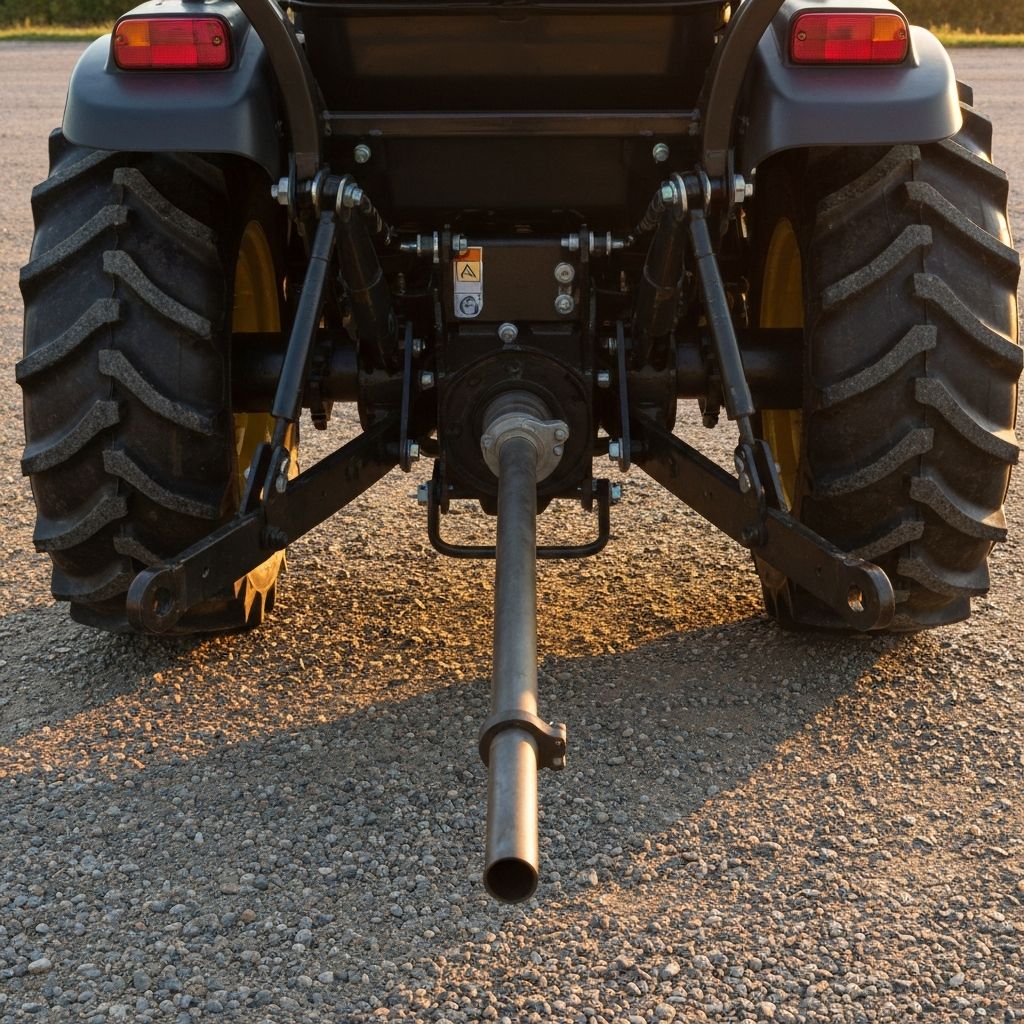
A power take-off (PTO) is a mechanical connection on the rear of your tractor that transfers engine power to implements like mowers, tillers, augers, pumps, and generators. Instead of each implement having its own engine, the tractor drives them all through a spinning PTO shaft.
When you engage the PTO lever or switch inside the cab, a clutch connects the tractor engine to the PTO stub shaft at the rear. A driveline shaft (with universal joints at each end) then carries that spinning power from the tractor to the implement gearbox, which turns blades, augers, pumps, or other working components.
How Power Flows
Quick Facts
- PTO shafts spin fast (540 or 1000 RPM) and deliver high torque capable of serious injury.
- Never operate PTO equipment without all shields and guards properly installed.
- Always follow both the tractor and implement owner manuals for PTO procedures.
PTO Standards: 540 vs 1000 RPM and Spline Sizes
PTO speed is standardized at two primary rates: 540 RPM and 1000 RPM. The speed must match between your tractor and implement. Running an implement at the wrong RPM can destroy bearings, gearboxes, and driveline components, or cause the implement to operate dangerously.
| Specification | 540 RPM PTO | 1000 RPM PTO |
|---|---|---|
| PTO Output Speed | 540 revolutions per minute | 1000 revolutions per minute |
| Typical Tractor Class | Sub-compact, compact, utility (18-80 HP) | Large utility, row-crop, farm (80+ HP) |
| Common Spline Size | 1-3/8" 6-spline | 1-3/4" 20-spline |
| Common Implements | Rotary cutters, tillers, augers, finish mowers, pumps | Large balers, high-capacity generators, combines |
| Mismatch Risk | Using the wrong PTO speed destroys bearings, gearboxes, and driveline components | |
Most homeowners and small acreage owners use 540 RPM PTO. If you own a compact or utility tractor in the 18-80 HP range, your tractor almost certainly has a 540 RPM PTO. Check your tractor manual for confirmation and spline specifications before purchasing any PTO implement.
PTO Attachments: Types and Best Use Cases
PTO-driven implements cover a wide range of tasks. Each attachment has specific PTO horsepower requirements, safety considerations, and terrain limitations. See the full tractor attachment guide for a broader look at all tractor implements including non-PTO attachments.
Rotary Cutter / Brush Hog
Clearing tall grass, brush, and overgrown pasture
- Match cutter width to PTO HP
- Overload protection required for rocky ground
20-60 PTO HP
Finish Mower
Lawn-quality mowing on established turf
- Best on smooth, level ground only
- Belt tension critical for clean cut
15-45 PTO HP
Flail Mower
Controlled mowing near fences, ditches, orchards
- Less projectile throw than rotary cutter
- Check flails regularly for damage
18-55 PTO HP
Rotary Tiller
Garden bed prep, seedbed creation, soil turning
- Hard or rocky soil demands more HP and slower passes
- Stop PTO to clear jams
18-50 PTO HP
Post Hole Digger / Auger
Fence posts, sign poles, tree planting holes
- Shear bolt protects gearbox in rocky soil
- Never hand-clear dirt while spinning
15-40 PTO HP
Broadcast Spreader
Fertilizer, seed, and lime distribution
- Verify hopper weight doesn't exceed tractor lift
- Calibrate spread pattern before use
10-35 PTO HP
PTO Wood Chipper
Chipping branches and property cleanup
- Extremely dangerous - always use push tools
- Never reach into feed chute
25-100 PTO HP
PTO Pump
Water transfer, irrigation, pond filling
- Prime pump before engaging PTO
- Avoid running dry - causes seal damage
15-60 PTO HP
PTO Generator
Backup electrical power from tractor engine
- Must match RPM rating exactly
- Use transfer switch - never backfeed outlets
20-120 PTO HP
Not sure what tractor size you need for your property tasks? See our Tractors by Task guide to match tractor horsepower to your primary jobs.
PTO Compatibility Checklist: Match to Your Tractor
Before purchasing or connecting any PTO implement, verify these critical compatibility factors. Use the interactive checker below to quickly assess whether an implement matches your tractor.
PTO Safety: Must-Know Rules
PTO-related injuries are among the most severe in agriculture. A PTO shaft spinning at 540 RPM completes 9 full rotations per second. Entanglement can pull a person into the shaft faster than anyone can react. These rules are non-negotiable.
Never Do This
- x Wear loose clothing, hoodie strings, scarves, or jewelry near PTO
- x Step over or reach across a spinning PTO shaft
- x Adjust, clear jams, or grease while the PTO is running
- x Operate with missing, cracked, or locked shields/guards
- x Allow bystanders, children, or pets near operating PTO equipment
Always Do This
- Shut off engine and remove key before any PTO hookup or adjustment
- Install all PTO shields and guards before operating
- Walk around the tractor and implement, never over or between
- Keep all bystanders at least 50 feet away during operation
- Engage PTO at low idle, then bring up to operating RPM
Critical Safety Warning
Entanglement can happen in a fraction of a second. Treat PTO shafts as lethal machinery at all times. A PTO shaft rotating at 540 RPM can wrap a sleeve, pant leg, or hair around the shaft before you can react. There is no safe way to be near a spinning PTO shaft.
How to Hook Up a PTO Implement (Step-by-Step)
Follow these steps in order every time you connect a PTO-driven implement. Skipping steps leads to equipment damage, driveline failure, or serious injury. This procedure applies to most compact and utility tractors with rear PTO and 3-point hitch.
Park, brake, and shut down
Park on level ground, set the parking brake, turn off the engine, remove the key, and wait until all PTO rotation has completely stopped before approaching.
Inspect shields and guards
Inspect all PTO driveline shields, guards, and cones. Verify they spin freely and are not cracked, missing, or locked to the shaft. Replace any damaged shields before proceeding.
Attach the 3-point hitch
Back the tractor to the implement. Attach the lower left arm first, then the lower right arm, and finally the top link. Install all pins and retaining clips securely.
Center and stabilize the implement
Adjust the top link length so the implement sits level. Set stabilizer chains or sway bars so the implement is centered with minimal side swing.
Clean and grease PTO splines
Wipe dirt and old grease from the tractor PTO stub splines, implement yoke splines, and the telescoping tube. Apply a light coat of fresh grease to all splined and sliding surfaces.
Connect the PTO shaft
Pull back the locking collar or press the release button on the implement yoke. Align the splines and push the yoke firmly onto the tractor PTO stub until the collar clicks into the locked position.
Perform tug test
Pull firmly on the PTO shaft to confirm it is locked and will not pull off the PTO stub. If it pulls free, the collar did not engage properly. Reconnect and test again.
Check shaft travel range
Raise the 3-point hitch to full height and verify the shaft does not bottom out. Lower fully and verify the shaft does not separate. The shaft must have safe overlap in both positions.
Attach safety chains for PTO guard
Connect the safety chains from the PTO guard to the tractor drawbar or a fixed point. This prevents the outer shield from spinning with the shaft.
First test run at low idle
With the operator seated and seatbelt on, start at low idle, engage PTO slowly, and watch for vibration, unusual noise, rubbing, or wobble. Disengage immediately if anything is wrong.
Common Hookup Mistakes (Expand)
PTO Shaft Length & Driveline Setup (Critical)
Incorrect PTO shaft length is one of the most common and most dangerous setup mistakes. A shaft that is too long will bottom out when the hitch is raised, destroying bearings and gearboxes. A shaft that is too short will separate when the hitch is lowered or during turns, creating a violently whipping hazard.
Too Long = Gearbox / Bearing Damage
When the 3-point hitch is raised, the driveline shaft telescopes together. If the shaft is too long, the inner and outer tubes bottom out, transmitting all compressive force into the implement gearbox or tractor PTO bearings. This causes premature seal failure, bearing destruction, and costly repairs.
Too Short = Separation + Catastrophic Failure
When the 3-point hitch is lowered or the tractor turns, the driveline extends. If the shaft is too short, the telescoping tubes can pull apart entirely. A disconnected, spinning PTO shaft whips violently and is immediately life-threatening. Never operate with marginal overlap.
Length Check Method (Engine Off)
- 1. Connect the PTO shaft and 3-point hitch normally.
- 2. Raise the 3-point hitch to full height. Check that the telescoping tubes have not bottomed out (you should see a gap between tube ends). If they compress solid, the shaft is too long.
- 3. Lower the 3-point hitch fully. Check that the tubes still have adequate overlap (at least 6 inches is recommended). If they nearly separate, the shaft is too short.
- 4. Turn the tractor at full lock (slowly, engine off) to verify no binding, rubbing, or separation at extreme angles.
If you must cut a PTO shaft to adjust length, follow the implement manufacturer's instructions exactly. Cut both halves (inner and outer tube) by the same amount to maintain equal overlap. Deburr all cut edges and ensure the telescoping sections slide freely after cutting.
Overload Protection: Slip Clutch vs Shear Bolt
Overload protection prevents damage to the implement gearbox, driveline, and tractor PTO when the implement hits an immovable object like a rock, stump, or fence post. Two common systems are used: slip clutches and shear bolts.
| Feature | Slip Clutch | Shear Bolt |
|---|---|---|
| How It Works | Friction plates slip under overload, then re-engage automatically | A sacrificial bolt shears (breaks) to disconnect the driveline |
| Best For | Implements that regularly hit obstacles (rotary cutters, tillers in rocky soil) | Implements with occasional impacts (post hole diggers, finish mowers) |
| Pros | No replacement parts needed after activation; re-engages on its own | Simple, inexpensive, easy to replace |
| Cons | More expensive upfront; plates wear over time and need adjustment | Must carry spares; stops work until bolt is replaced |
| Maintenance | Check plate torque periodically; replace plates when worn | Always carry spare shear bolts; use correct grade (never substitute harder bolts) |
| Typical Implements | Rotary cutters, flail mowers, tillers, wood chippers | Post hole diggers, finish mowers, some spreaders |
Practical tip: Brush hogs and tillers often need overload protection because they regularly encounter hidden rocks, roots, and stumps. If your implement did not come with a slip clutch, consider upgrading the driveline to one with built-in overload protection. Never substitute a harder bolt for a shear bolt, as this removes the protection and transfers all shock force to the gearbox.
PTO Driveline Maintenance & Storage
A well-maintained PTO driveline lasts for years. A neglected one fails fast, often in the middle of a job. Follow this maintenance schedule to keep your driveline safe and reliable.
| When | What to Do |
|---|---|
| Before Each Use | Visual inspection of shields, guards, and driveline for damage. Verify all safety chains are attached. Check for wrapped debris. |
| Every 8 Hours of Use | Grease all universal joints (each cross has a grease fitting). Grease the telescoping tube. Verify the shield spins freely (not locked to shaft). |
| Seasonal Deep Check | Inspect for rust, bends, hairline cracks on tubes and yokes. Check universal joint play (any looseness means replacement). Verify spline wear. |
| Winter Storage Prep | Clean thoroughly. Apply grease to all exposed metal surfaces. Store horizontally on supports (not leaning). Keep in dry, covered area. Leave shields installed. |
| Spring Startup | Re-grease all fittings. Manually cycle telescoping tube to verify smooth sliding. Inspect for rodent damage to shields. Test PTO engagement at low idle before work. |
PTO Troubleshooting: Symptoms, Causes, and Fixes
When something goes wrong with your PTO driveline, quick diagnosis can prevent expensive damage. Here are the most common issues and recommended first actions.
| Symptom | Likely Cause | Recommended Action |
|---|---|---|
| Won't connect | Misaligned splines, dirt in yoke, damaged collar | Clean splines, align carefully, check collar spring |
| Vibration / noise | Worn U-joints, bent shaft, excessive angle, unbalanced implement | Stop immediately. Inspect U-joints, shaft, and implement balance |
| Binding when lifting | Shaft too long (bottoming out at full raise) | Check shaft length at full raise. Shorten per manufacturer specs |
| Slipping / no power | Worn PTO clutch, slip clutch needs adjustment, shear bolt broken | Check slip clutch torque setting. Replace shear bolt. Inspect PTO clutch |
| Guard stuck / spinning | Safety chain disconnected or broken, guard locked to shaft | Stop immediately. Reconnect safety chains. Replace damaged guard |
Stop and inspect immediately if you experience persistent vibration. Continued operation with a vibrating driveline leads to U-joint failure, shaft breakage, and potential injury from flying parts.
Detailed Troubleshooting (Expand)
Tools & Supplies You Actually Need
Keep these essentials in your shop or tractor toolbox for PTO hookup, maintenance, and field repairs.
Essential Tools
- Grease gun loaded with NLGI #2 lithium grease
- Clean rags and stiff brush for cleaning splines
- Work gloves and safety glasses
- Torque wrench (if required by implement manual)
- Degreaser spray for stubborn spline buildup
Good to Have
- Penetrating oil for stuck collars (use in ventilated area)
- Spare shear bolts (correct grade for your implement)
- Spare retaining clips and hitch pins
- Wire brush for rust removal on stored shafts
- Tape measure for shaft length checks
Downloadable Checklist & Quick Reference
Download and print these references so you have them in the shop every time you connect a PTO implement.
Download Center
PTO Hookup & Safety Checklist
Complete hookup procedure with safety checks for every PTO connection.
Free Download, No Sign Up Required
PTO Compatibility Worksheet
Pre-filled worksheet with 9 common PTO implement specs you can edit.
Free Download, No Sign Up Required
On-Page Checklist Preview
Before You Start (60-Second Safety Setup)
- Park on level ground (no slope), lower 3-point arms, set parking brake
- Engine OFF, PTO disengaged, key removed, wait until all motion stops
- Wear snug clothing (no loose hoodie strings), tie long hair, remove jewelry
- Clear the area: no kids, pets, or bystanders within 50 ft
- Verify implement is stable (stands/blocks in place if needed)
Compatibility Quick Check
- Tractor PTO speed: [ ] 540 RPM [ ] 1000 RPM [ ] Both
- Tractor PTO horsepower (PTO HP): _______
- 3-point hitch category: [ ] Cat 0 [ ] Cat 1 [ ] Cat 2
- Implement name/type: __________________________
- PTO RPM matches (540 to 540 or 1000 to 1000)
- PTO shaft spline/type matches tractor PTO stub
- Tractor PTO HP is within implement required range
- Tractor can lift/carry implement safely (not just power it)
- Hitch category/pin size matches (Cat 1 vs Cat 2)
3-Point Hitch Connection (Order Matters)
- Back tractor slowly to align lower arms with implement pins
- Attach left lower arm pin + clip
- Attach right lower arm pin + clip
- Attach top link pin + clip
- Adjust stabilizers/anti-sway: implement centered, minimal swing
- Raise implement slightly and verify it's secure + balanced
PTO Shaft Connection (Correct Technique)
- Inspect PTO driveline: no cracks, bends, missing parts
- Confirm all PTO shields/guards are installed
- Wipe dirt from tractor PTO splines + implement yoke
- Lightly grease splines + telescoping section (per implement manual)
- Pull back locking collar / press release button on yoke
- Align splines and push yoke fully onto PTO stub
- Release collar/button and confirm it clicks/locks
- Perform tug test: yoke does not pull off
- Attach PTO guard safety chain(s) so shield stays stationary
PTO Shaft Length & Clearance (Critical)
- With 3-point fully lowered, shaft has overlap (not near separating)
- With 3-point fully raised, shaft does not bottom out/compress solid
- Shaft does not rub tires, drawbar, PTO guard, or implement frame
- Turning clearance check (slow, engine off): no binding in wide turns
First Test Run (Safe Startup)
- Operator seated, seatbelt on (ROPS up)
- Start at low idle
- Engage PTO slowly (no high-RPM shock loads)
- Listen/observe for: vibration, knocking, wobble, rubbing, smoke
- Disengage PTO and shut down immediately if anything looks wrong
Operating Rules
- Never step over a PTO shaft
- Never adjust, clear jams, or approach while PTO is rotating
- Keep RPM where the implement is designed to run (per manual)
- Avoid sharp turns with PTO running (use wide arcs)
- Stop PTO before reversing unless manual explicitly permits
After Use
- Disengage PTO, idle down, engine off, key removed
- Brush off debris from driveline + guards
- Check for wrapped grass/string; remove only when fully stopped
- Grease if required (heavy use often = every ~8 hours)
- Store shaft supported off the ground (don't leave it dragging)